|
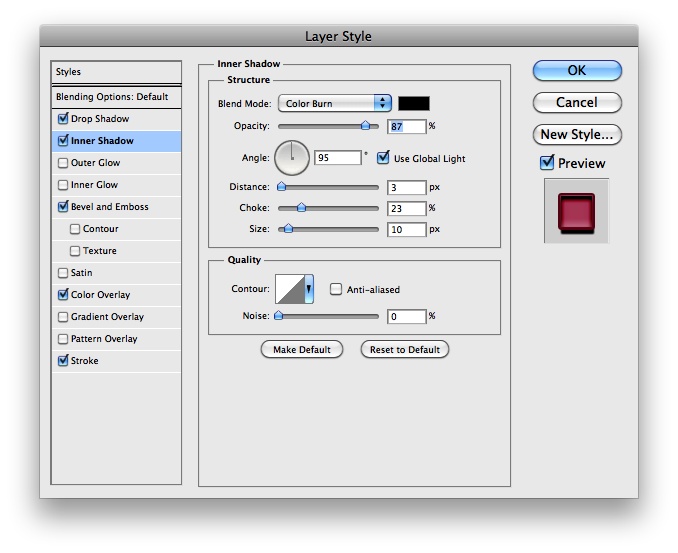
Casino Classic boasts a vast selection of over 521 casino games, including the progressive jackpot slot games Mega Moolah and Major Millions. It also provides you with fast payouts online 4 baby, an exclusive VIP team and 24/7 multi-lingual support. At Casino Classic, you can expect to have an exciting time as you collect loyalty points and benefit from our regular promotions. With the text layer selected go to Layer>Layer Style>Drop Shadow. Use the values below for the Drop Shadow.
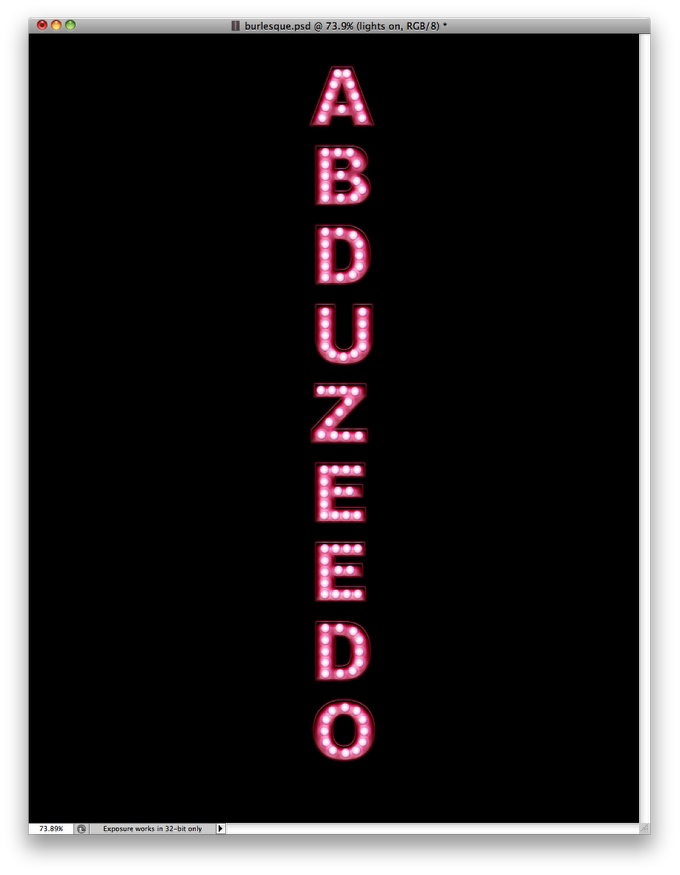
Select the lights layer and go to Layer>Layer Style>Drop Shadow. Use the values below for reference. Light effects are my favorite type of effect, I don't know why but I always liked to play around in Photoshop trying to recreate them. Then once I discovered the power of the Blend Modes, especially the Color Dodge best online casino in the united states, creating this effects became much easier. So in this tutorial I will show you how to create a super cool text light effect mixing some photos to give more realism. The cool thing about this effect is that the whole process is very simple and quite easy.
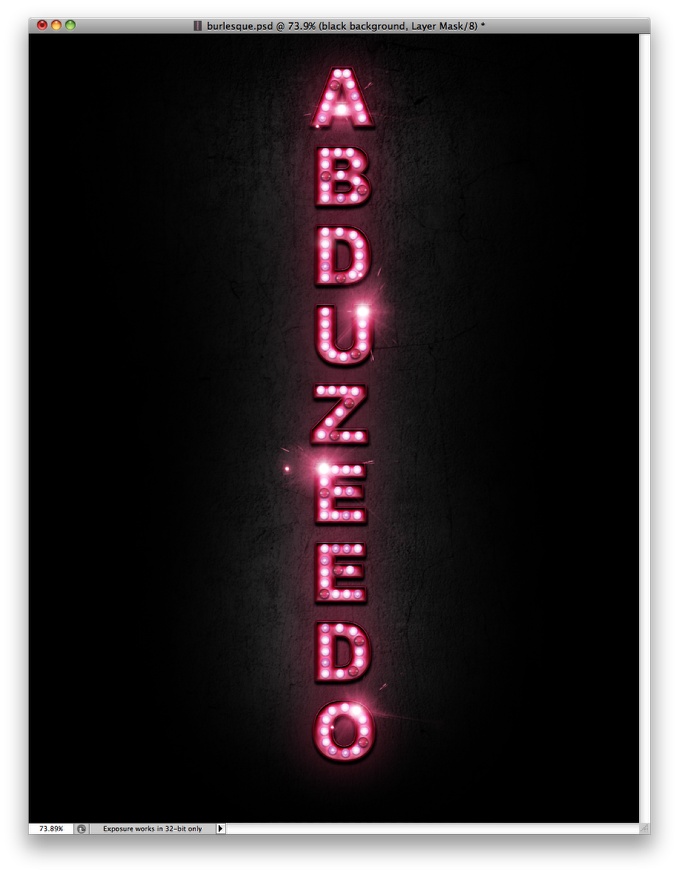
Open Photoshop and create a new document, the size I'm using is 1113x1440 pixels. Make sure that the background is in black. After that add a text in a vertical order. The word I added is Abduzeedo and I used Arial Black for the font. Select all layers and duplicate them, after that merge the copies into a new document, you can also do that using the keyboard shortcuts Command(mac)Control(pc) + Alt + Shift + E. After that go to Filter>Blur>Gaussian Blur. Use 20 pixels for the Radius. You will get a pretty blurry layer free online casino canada immigration, so change the Blend Mode to Screen and the Opacity to 60%. that will create a really cool glowing effect. With the Eraser Tool (E) and a very soft brush, resize it so it will be the size of the lights bulbs. Then with the blurry layer from the previous step selected start erasing some lights in order to make the signage less uniform casino canada 0 mexico, so there will be lights not so bright. That again will give more realism to the composition.
In case your text is not the sort of dark pink I'm using you can use Color Overlay to change that. The exact color I'm using is #b2355b. Move the texture so it will be behind the black background. Then with the Eraser Tool (E) delete and a very soft brush with 20% opacity online slots real money canada day, start erasing the area over the text in order to show off the texture a little bit.
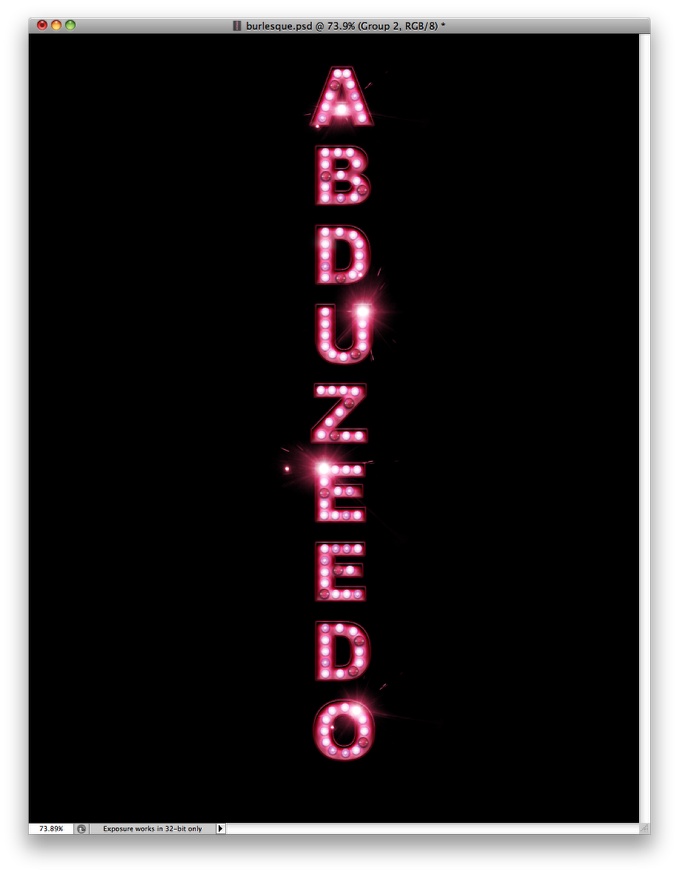
Let's add some flares as there is in the Burlesque poster I used for reference. The flares I'm using is from an image and you can download it here. After that resize the image and delete the other parts of it leaving just the flare itself. To make the colors match, go to Image>Adjustments>Hue and Saturation. Again select the Colorize option and change the hue to pink. This layer will use Screen for its Blend Mode. This is the effect we have gotten so far. In this tutorial we just played with layer styles and blend modes, mixing with some elements from real images in order to create some realism. The process is pretty straight forward and now you can apply that to your future projects or if you want you can go ahead and finish the Burlesque poster playing around with some photos of girls. Select the texture layer and go to Layer>Layer Style>Color Overlay. Use pink for the color and Multiply for the Blend Mode. We are doing this in order to make the texture get the pink color, as it was being illumiated by the pink lights of the sign. Go to Image>Adjustments>Hue and Saturation. Click on Colorize and them change the Hue to pink.
0 Commentaires
Laisser une réponse. |

 Flux RSS
